More About the Girls

Showing posts with label becky. Show all posts

Saturday, April 6, 2013

AP April Challenge - Birds

It's time for another Altered Pages Challenge!
{Technically, it doesn't start until Monday, but I couldn't contain myself any longer!! So I'm getting a jump on it today!}

Haven't participated in a challenge yet?
It SUPER easy! Just hop on over to the AP Challenge Blog for the monthly details (2nd Monday every month); create a project using at least ONE image/product from Altered Pages; write about it on your blog & link up to the Challenge Blog!
It's that easy! 
C'mon...join in on the fun!
There's always a great prize package! And sometimes Jean adds more prizes for every day that someone links up their projects! WOW

"She was a nurturing soul"
Ok, so...I decided to approach the challenge a little differently this month & although the theme is Birds, I didn't really "focus" on the birds in my project...I wanted to play at drawing faces & creating a mixed media 11x14 canvas from there. This is my end result & I LOVE it! LOL!! If you want to see more, head on over to my personal blog - My Laughing Magpie! Or if you want to buy it, she's listed in my Etsy shop as well!

Supplies used:
Vintage Bird Cards AP 1790 (collage sheet)
Glitz Papers from Beautiful Dreamer Collection & tiny alphabet (background & title)
Gel Medium (adhesive)
Molding paste (hair)
Acrylic paints (all over)
Stamps (texture, background)
Colored Pencils & Inktense Blocks (face)
Found objects (hair accessories, necklace & broach)
Shredded paper (nest)

Hope you'll vote for me when the voting opens on the Challenge Blog!
Cheers!

Thursday, March 14, 2013

Lovely Lavender...an Altered Pages Challenge Post

Altered Pages is celebrating the coming of Spring with their latest challenge - Lavender Thoughts!
I missed last month's challenge, so I wanted to be sure to get in on the fun this month! And what better way than an ATB! 
An Artist Trading Block that is! 
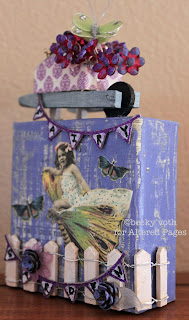
What IS an ATB you ask...its a chunk of wood that you can spruce up with whatever strikes your fancy & trade it with other artists like ATC's or simply keep it for yourself to admire! 
I'm keepin' mine! LOL!!

First I covered the block with a couple of pieces of Bazzill's Antique papers

Then I painted over that with a mixture of white glitter paint & the lovely Eco Friendly Paint in "Matte Eggplant" to make a lavender color. Next, I added the cute fairy on her butterfly from the Children on the Wing collage sheet & butterflies from the Victorian Butterflies sheet; the picket fence & some other little treasures from my stash. 

Finally I used some Glitter Silk paper & the "Strings of Pennants" die to create the "Fairy Garden" banner.

Don't forget to vote on/after the 15th for your favorite DT project & enter your own for this FABULOUS prize pack...
Thanks for stopping by!
Cheers!


Tuesday, January 22, 2013

Altered Pages Challenge #5: "Snow Dancing"

It's time for another AP challenge, using AP products...of course! Cuz they ROCK!!!

The theme this month is "Snow Dancing."

I am the first to admit that I am NOT a seamstress!
BUT, I LOVE to use my sewing machine when creating altered pieces & kinda feel that if it's just for me, I can get away with crooked lines!!
This one was inspired by our very own AP DT member, Tristan Robin Blakeman, who creates the most AMAZING altered fabric collage art!!! 
{Mine is nowhere near as lovely as his, but I like it anyway!}
I used an image from the "Vintage Ice Ballet" collage sheet sewn upon layers of linen, satin, some strange foil-like material, flowers, trim & mother of pearl buttons! I left a little pocket at the top so that I can slip a dowel through it later to hang.

I hope you will join in on the challenge this month! Jean is promising a big prize package with up to 10 products! The catch - more people need to sign up for the prizes to continue to grow! You can read more about the challenge here!
Thanks for stopping by today!

Cheers!


Sunday, October 7, 2012

Save the Ta Ta's!!!! - An Aaltered Pages Challenge

Hello & thanks for stopping by today!
It's time for another Altered Pages Challenge!
This time around, it's all about the PINK!
PINK for Breast Cancer Awareness Month!!

This is my good friend Kathy today,
Dakota is constantly nibbling on her!
She is an amazing woman! She's a "Frenchy." Meaning, she was born in France, but you'd never know it until you hear her speak French! She's one of the most down-to-earth people I know! She's generous, kind, funny & a FANATSTIC cook! She's an awesome mom & I assume, wife, cuz she & her hubby Tim have been together a long time!! Several years ago they moved to the mountains & she got a horse...2 horses, 2 cats & 2 dogs later...She teaches riding lessons to all the kiddos (including Maggie) & is simply enjoying life now. But it wasn't always so...
 
She was 1st diagnosed when she was in her early 40's. She went through a tough surgery to remove & reconstruct the one breast (no chemo or radiation). All seemed clear until she had JUST hit her 5 yr mark & was diagnosed in the other breast. Surgery again, but this time chemo & radiation was needed...during her last round of chemo, we invited them to come to Maui with us...
No hair, insert for her bra & swims suits, tired, sick feeling, but along she came for a much needed break from all the cancer chaos! She's had a much tougher time coming back from this one but it's been almost 2 years now & she's doing awesome (as you can see from the silly horse pic above!)

So, I dedicate this post & my PINK project to my good friend Kathy! May you have many, many more healthy years with us all!!!

{Sheesh! Sorry to get so wordy, but I wanted to share how breast cancer has touched our family, as I'm sure it has yours or someone close to you.}
*****
For my PINK project, I altered a Barbie! Have you ever done this? It's challenging, but SUPER fun when it's all done! 
(You can catch a glimpse of  my Travel-Steampunk Barbie HERE)
First, I sprayed her with a primer (very important step & be sure to cover her hair w/plastic wrap or it'll be grey!); then I covered her with tissue paper to add some dimension & texture - plus this allows you to "cement" the doll into the position you want when she dries (I only had polka-dot tissue on hand!!); cut out images from the following COLLAGE SHEETS & glued them to her body:
(That was a little challenging when printed on cardstock. So I reprinted them on regular computer paper & they were easier to manipulate.)
added bright pink paint to her entire body with my fingers; added PAPER FLOWER wings & flowers here & there; mixed light pink paint with gel medium & mussed up her hair (let dry in this crazy fashion!); 
 applied a spray adhesive to her body, then sprinkled with PINK German Glass Glitter. Then I embellished her head with some eye-pins, beads & breast cancer ribbon charms;
 her "SAVE THE TA TA'S" sign was made from some GLITZ "Beautiful Dreamer" paper scrap & letter stamps; covered the spool with more GLITZ paper; nailed & glued her to the spool & then finished by embellishing the spool a little. My only regret? I wish I would have put her arms up over her head with the sign!! Maybe the next one! :)~
SO, here's YOUR part of the Challenge:
Create ANYTHING in PINK! Really! ANYTHING!!!
Jean has so graciously offered up some really great prizes for those that participate in creating some thing PINK! {visit the challenge blog for more details!}
Think PINK GRAND Prize Package!
When you're done creating ANYTHING PINK & post it to your blog & link it up on the Challenge Blog. We (the DT) will vote for our favorite project & the Grand Prize winner will be announced on the AP Challenge Blog & 3 lucky runner-ups will get a COLLAGE SHEET of their CHOICE!! {The only rule for this challenge is that the project must be created FOR this challenge (can be combined with another if you have obligations to meet!) }

So, c'mon! What are you waiting for?
Go get PINK!!
OH! I almost forgot!
We'd also like you to VOTE for your FAVORITE  PINK project created by a design team member!
So be sure to stop by the Challenge Blog & vote!!
"TA TA" for now!


Thursday, October 4, 2012

It's TiMe for a SpOokEy, CrEePY FaLL Blog Hop!

Welcome to the Altered Pages Halloween/Fall Blog Hop!!
WARNING! WARNING!
BEWARE OF PROJECT OVERLOAD!!!
You've been warned...I went a little overboard for this hop & wanted to apologize for any overwhelming qualities on this post! LOL!!

First of all, let me get the specifics outta the way...
Hopefully you've joined me here via the Altered Pages BLOG & have started from the beginning cuz each of the designers are giving away a Halloween-themed digi-collage sheet to TWO winners, courtesy of Altered Pages (THANKS JEAN!!) by leaving a comment on each blog & becoming followers!
In addition to that, Jean is also giving one lucky winner a Pink Scissor Mouse, so be sure go back to the beginning & leave a comment that you finished the hop & left comments/follow along the way!

AND...could it get any better?!!
YES! It CAN!!
I am also giving away some blog candy...a kit to make my "Skeleton Stomp" Domino Book that is for sale on the Altered Pages website (contents vary slightly)!!! Just be sure to leave a comment telling me which project you liked best & you'll be entered in a random number drawing for it! YAY!!
...now let's get down to it!!!!
I simply ADORE this time of year with all the GORGEOUS color around us! Not to mention how fun it is to decorate & dress up for Halloween!!! So that's pretty much why I went WAY overboard for this hop! I just couldn't stop myself!!!

So, this is my "hall tree" where we usually hang our coats, but since I don't have a fireplace mantel, it's become my substitute for displaying collections like this!
See what I mean?? Craziness, huh?!
{There are a few things up there that I had created a month or so ago & you can read about those here: (the green dressform) & HERE (the little skeleton tin)...}
For this Hop, I started with an image from the Wicked Witches collage sheet that I simply cropped out & added to the saying "Keep Calm & Ride On!" (I even made one with a turkey from the Gobble Gobble sheet that says "Keep Calm & Gobble On" to change out next month!

I also made a set of bottles using the Macabre Page Image  as my template to create some spooky labels:
Witches Brew
Ravens Blood
Siren Song Elixer
 The Siren Song Elixer is my favorite!!! I used  a couple collage sheets of some VERY saucy women & a little bit of German Scrap!! (Laying Down on the Job & Erotica)
The Ravens Blood one has cutouts of ravens here & there from the Poe's Raven sheet.
Last is my MOST favorite!
I have never made Tussie Mussies before, but decided to give it a try! 
If you look closely, you'll see that I used ENTIRE collage sheets as patterned paper for the cones!! How clever am I?!! LOL!!
I used four different sheets to make the cones:
Here are some close-ups of the embellishments themselves:
Whew!
On top of all that I made a wreath too...you can see it HERE!
That's it, REALLY!
Hope you had fun looking at my projects today! Don't forget to leave a comment about what you liked best so you can be entered into the contests!

OH- ONE MORE THING!
We are starting another challenge on Monday, 10/8 with an AWESOME prize pack, so be sure to check in on the Altered Pages Challenge Blog for more details!
Cheers!
Don't forget to keep hoppin' around!


Tuesday, August 21, 2012

some news to share...

Just want to toot my own horn...I am FINALLY a Somerset Studios published artist!!
See my post over at My Laughing Magpie...
HERE

Cheers!

Saturday, August 18, 2012

The Altered Spoon, a Blog Hop!

Good Morning, Afternoon or Evening to you, depending on where you hail from!!
Hope you are having fun hopping along with this Altered Spoon Challenge hosted by Susan Brown of SBArtist: Painting in the Dark! Happy 5 yr Blogiversary to her!!!
My name is Becky Voth & I am a design team member with Susan over at AlteredPages.com! I am also a mixed media artist living in Colorado. I like to work with all kinds of materials & for this challenge, I had so much fun, that I made TWO completely different spoons! I hope you find them inspiring!

First, I wanted to make one in a Halloween theme, but not your typical witches, ghosts & goblins type of Halloween theme!
My 6 yo daughter has decided that she will be a Fairy this year for Halloween!
So, I made this spoon to hang in her room after Halloween.
The scalloped brown oval is actually an accordion mini-album. I made it using the tutorial by Michele Kovack on her blog called Thoughts of a Cardmaking Scrapbooker as my guide, but I tweaked it a little. {You can find it here.} BUT, instead of making a little book that opens one way like she did, I had to make it more complicated & have it open both ways! So, when you open the book, this is what it looks like...
I left a couple of blanks for photos of my daughter & the rest of the images are from the Fairy Alphabet collage sheet at Altered Pages, spelling out Hall-o-ween.
{I used brown Co'odinations cardstock for the scalloped ovals (cut from a Spellbinders die & then sanded), layered with cream Bazzill Bling that I stamped & embossed with a Stampin' Up Mum stamp. After I added the little Fairy images, I used my finger to add some light pink here & there. I painted the whole spoon a pearly cream & also stamped the mums on the handle of the spoon & a little pink here & there too. It took a little engineering to figure out how to keep the book all together while it hangs on the wall - I added a 2nd length of seam binding onto the bowl of the spoon before attaching the book to the spoon. Then when I fold up the pages, I run the new ribbon under the cover of the book before I tie it all off together - giving me a double bow.}
It will be fun to add tiny pictures of my own little fairy later this year - as long as she doesn't change her mind! Then it will go up for sale on Etsy!! LOL!

And now for something COMPLETELY different!
My Angel Spoon!
I sanded the spoon a little & then hit my stash of vintage & altered goodies to "collage" linen, lace, scrim, appliques & rhinestone buttons onto the spoon. The image is again from Altered Pages, Renaissance Angels.
{Although, she looks a little bit more like a cupid, I thought she was prefect!!}

I used an oval embossing frame from Stampin Up & cut out the ovals with my Spellbinders Ovals again; glued them together & set it aside while I finished the lace work. When the handle of the spoon was dry, I glued her on with a couple of layers of 3D tape behind her so she wouldn't sink into the bowl of the spoon. Lastly, I added the angel wings.  {From Michaels in the doll-making aisle!} How PERFECT are they!!!
{I spritzed them first with some Glimmer Mist to age them a little bit.}
Here are a couple of close-ups of the top & bottom of the spoon...

I am totally in love with this girl now!!
Hope you had fun looking at my Altered Spoon Creations & I would love to hear your thoughts & have you as a follower!!

Below is the linkz to check out more artists creations & we'd love it if you'd play along too!
Cheers!


Presenting the artistes de spoon...


Friday, August 10, 2012

FINALLY! I'm Gelli-n!!

What an awesome day!! First though, I have to apologize for the photo quality...the lighting was not so great at my moms dining room table! But hopefully you will get the gist of the fun we had!!
a table full of fun!
My mom, sister & I played with the Gelli Arts Printing Plate ALL day long {available here, at Altered Pages}!!! OMG! You have to get one of these things! It's so much fun & so very cool & versital!
We tried it the Gelli Arts Way, painting layers upon layers with texture in between...
I learned that you need to start with your darkest layer first, DUH!...my green was on the bottom & it barley shows through the other 2 layers!
 for this one, I just blobbed paint {very technical here!} onto the plate & placed my paper over it without brayering! It looked like an inkblot! Then I layered more green & yellow with the brayer onto the plate & then stamped a butterfly in black paint. It didn't quite work out, but kinda cool!
my little village?
mom's spooky house
 These two, my mom & I placed the paint where we wanted it, then stamped a Claudine Hellmuth foam house stamp into the top layer of paint. I like mom's on the bottom - kinda spooky!
pink bunnies & teeth?
 These two, I played with some pinks...didn't quite get the paint spread around on the top one, but still the pattern is fun. What do you see in the picture? I see a long pink bunny!
used a "funny brush" for the weird texture
 Below, is one of Kim's pages...very cool print where she layered light pink over a slightly textured blue & then stamped the image of the girl into the pink - all on a jumbo playing card! It's great to see that a very detailed stamp works in paint too!
Kim's girl card

had to try some poppies!
 Above, I layered black & red & stamped a Stampin' Up Poppy image into it. Below, mom layered & textured & masked some birdies. Then when dry, she added a text stamp {text prints in reverse on the Gelli!} here & there & then outlined the birds! Awesome mix!
Then, we tried another technique I saw on Youtube, where you place a dab of 3 colors on the plate in various places & then brayer it around & texture before placing your paper down. I have to say, this is the one we did the most of...
 Above, my first attempt...mom's below...
 Getting more interesting as I layered 3 colors, used a dot roller & a bird mask...
funky & cool, right?
 Blended the colors a little more on the next & then stamped with a giant butterfly!

Maggie had to play too...
a peel from one of my print

Just look at her awesome colors & placement of that feather stamp! Sometimes I can't believe she's only 6!!!
On this one, I did my 3 colors, then brayered an awesome grafitti stencil from The Crafter's Workshop; layered some bubble wrap over that & finally another circle stencil from Mr. Huey's. Not as much color as I wanted, but still very cool!
This is one of my favorites...I simply brayered a denim blue with white; added a little black to the balloon stamp & plopped it down. It's very dreamy to me!

So, things I learned about the Gelli...
1. It doesn't take a lot of paint, but may take more than you think! Some of my prints were kinda "dry" & others heavy...it's definitely a "Goldielocks Moment," to quote Julie Fei-Fan Balzar!
2. Don't waste your money on heavy, art papers until you are comfortable with your results! We started off with a 140lb mixed media paper, but switched to book pages & 65lb cardstock since we were just experimenting.
3. Stock up on good baby wipes! We went through an entire box today!! Between cleaning the Gelli & the brayer...wow!
4. Keep a tray of wet water near by to throw your stencils & unmounted stamps into until you are ready to clean them! Otherwise the paint dries & it's hard to clean off!
5. Have fun & just let whatever happens, happen!

Remember, there are no mistakes! Just ART!
Bedtime!!