Welcome & thanks for buying my Gypsy Soul Kit from Altered Pages!
Here you will find photos of my completed book that might help inspire you while creating your own Gypsy book!
Here we go...
I used every collage sheet containing images of Gypsies that Jean carries! Some I just trimmed the frame, others I fussy cut out. Either way, I planned ahead which Gypsy I wanted to represent that piece of the poem in the book.
 |
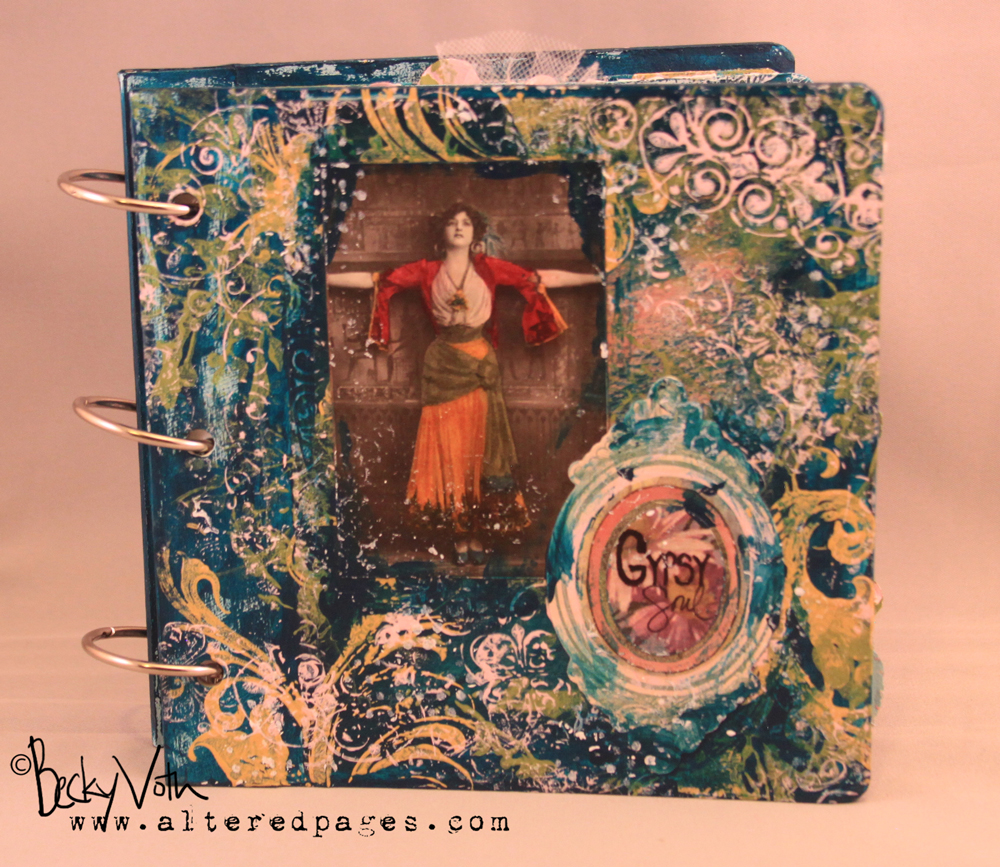
| Cover | |
Cover: other than the paper used for the image & the title, the cover is 100% paint! I covered the background with teal paint & then textured with stamps in the pink, green & ochre paints with just a hint of white. I cut out my Gypsy & colored her in with markers; the title has 2 layers of paper on a Glitz sticker before I wrote out the title with a Sharpie.
 |
| Pg 1 |
For page 1, I tore a piece of patterned paper to place behind my gypsy. Before I put her & the fussy cut butterflies on the page, I smeared teal, green & pink paints around the page; adhered the images, then smeared a little more, as well as some touches of white with punchinella.
 |
| pg 2 |
For the background of these pages (2-3), I used some handmade "Citrasolv" papers before smearing more green, teal & pink paints around the edges. {I decided to cut some of the text out & hand-write the rest with a black paint pen.}
 |
| pg 3 |
The same background here, but then I layered my gypsies with the moon & some flowers before adding more paint.
For these papers, I layered tissue paper on the background & wrinkled it up a bit. Then I covered it with yellow ochre & smeared teal & green here & there. I added cut my flowers in 1/2, created a tag from patterned paper, added my gypsies & the "Beautiful" sticker before adding more texture with a stamps in pink & white paints.
 |
| pg 4 |
 |
| pg 5 |
I apologize that the directions didn't have a better picture of how to use modeling paste with a stencil! I apparently forgot to take pix as I did this step! But here (pp 6-7) I used an inexpensive circle stencil from Hobby Lobby & paste to create my background. **TIP: Melody Ross works with "modeling paste" too, but guess what! She uses paintable CAULKING that you get at the hardware store! When I run out of paste, I'm picking up some of that!**
 |
| pg 6 |
Then I used my fingers to spread green paint over the raised design. Again, using my finger & some punchinella, I added more paint colors to both pages before adding my text & gypsy. (I HATE how my writing turned out on this page - hard to read, but oh well! What's a girl to do?!)
 |
| pg 7 |
 |
| pg 8 |
 |
| pg 9 |
Again, on pages 8-9, I used mostly paint with my texture tools, but I did start off by laying a 12x12 stencil across the pages & spraying with a pink glimmer mist. (AP only carries some colors of the Maya Mists, but I think any would work fine!) I used a different stamp or punchinella for each paint color layer. I cut out my gypsy & gave her wings before adding more texture along with the text.
 |
| pg 10 |
 |
| pg 11 |
On pages 10-11, I used the Citrasolv papers again, torn into corner pieces; covered the background with these & some teal paint. Added my images before more texture with stamps & paints. Finally adding the poem text.
 |
| pg 12 |
 |
| pg 13 |
For these pages (12-13), I sprayed some pink glimmer over the pages, then stamped in teal with a large swirl, smeared green paint here & there; stamped some more with a circle stamp in the ochre. After the images & flowers were down, I smeared more green paint with some white punchinella.
 |
| pg 14 |
 |
| pg 15 |
On pages 14-15, I smeared teal & green paint onto the background, framing a piece of Citrasolv paper; adhered the gypsy images before adding more texture with pink & ochre smears. Added text.
 |
| pg 16 |
I'm afraid I went a little TEXTURE CRAZY at this point! I layered & layered with every color on a different stamp for pp 16-17! added the images & some trim before adding even MORE texture in white & a little more pink!
 |
| pg 17 |
For pp 18-19, I used a piece of Glitz patterned paper on the background before adding texture, images & text with smears & a couple stamps.
 |
| pg 18 |
 |
| pg 19 |
Pages 20-21 also have Citrasolv backgrounds, but here I relied mostly on bubble wrap & punchinella to create my texture, with the exception of some black ink & a text stamp here & there. Once my gypsies were down, I smeared teal paint across edges to frame.
 |
| pg 20 |
 |
| pg 21 |
On pages 22-23, I used the ochre & pink paints with stamps; adhered gypsies, then smeared green & teal around edges before adding a little white texture with a stamp too.
 |
| pg 22 |
 |
| pg 23 |
Again, another momentary lapse in Texture Judgement - used them all on pp 24-25! Started with some more modeling paste & the same circle stencil; then added paint smears in teal & pink. Topped that off with green & ochre stampings before placing the images down. Then used puchinella to add some white.
 |
| pg 24 |
 |
| pg 25 |
Lastly, I covered the pages with teal. then used a pallet knife to spread the ochre here & there; stamped over that with a music stamp in green paint, then another stamp in pink. Adhered the gypsies & flowers before smearing green paint here & there, along with adding the last of the poem.
 |
| pg 26 |
 |
| pg 27 |
Finally, when all the pages were done, I went back through & added touches of paint as needed, as well as casually placing bits of black rub-ons here & there.
I think that's it!
Please feel free to contact me or leave a comment if you need anything!
I am hoping to re-vamp our site to include more pages/tutorials like this one soon!
Have a wonderful day!
Cheers!


No comments:
Post a Comment